Create GitHub Repo (GUI)
In the previous post, we learned about commit, fork and clone. In this post, we are going to take a deep dive into the terminology by creating a GitHub repository from scratch. To create and host a project, the repository is the place where you add all your program code files and other documentation.
Prerequisites
Set one up in Setup GitHub Account →
Plus a basic idea of how Git works. See Setup Git →
Your progress
How to create a GitHub repository
Step 1: Open New repository
Go to the GitHub website. By default, you will be on the Home page as shown below. Click on the + icon in the top-right corner, and from the dropdown, select New repository.
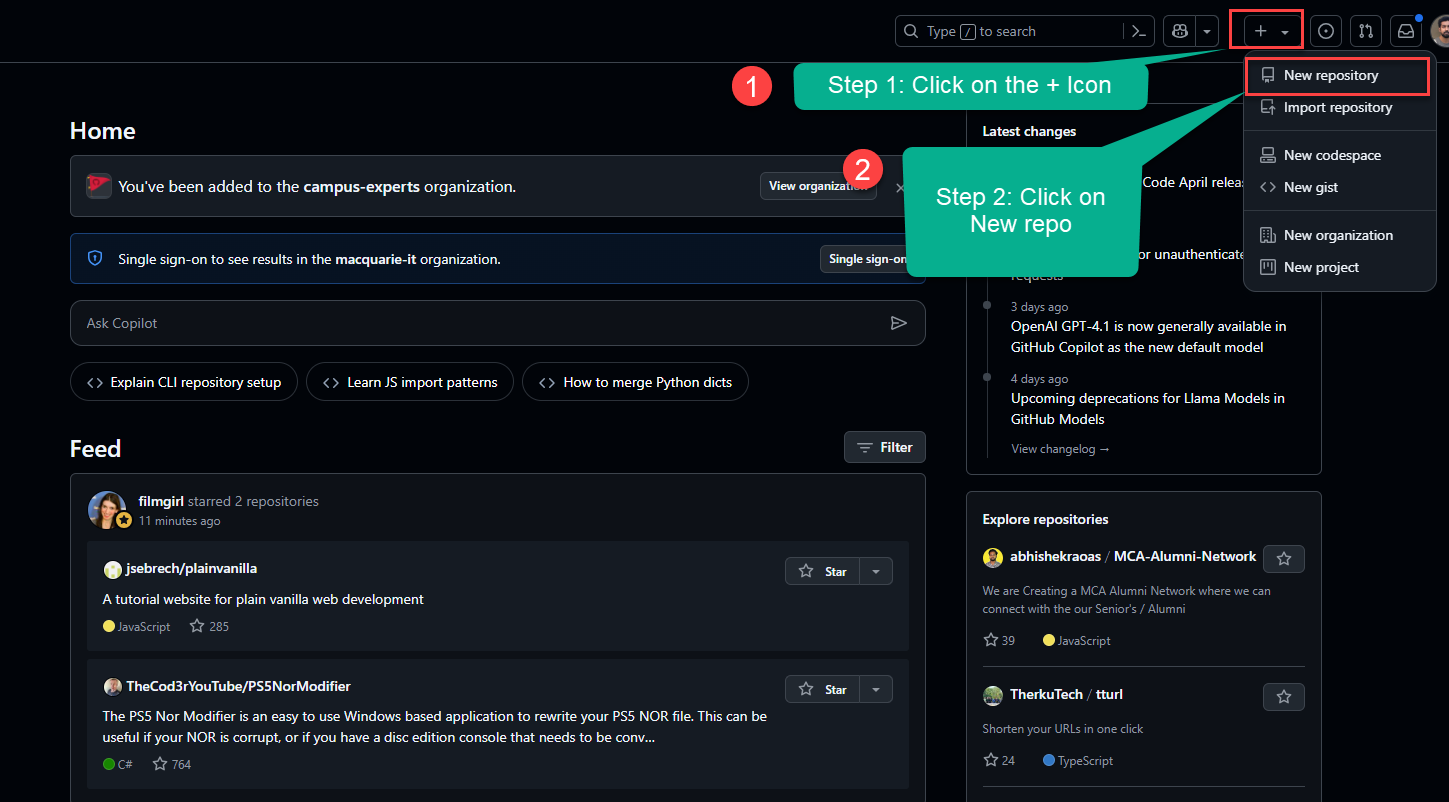
- Marker 1: Click on the + icon
- Marker 2: Click on New repository
Step 2: Name it and choose who can see it
Specify the name of the project and choose whether to make it public or private. For this tutorial, we’ll make it public.
Next, check the box to include a README file. This will automatically create a README.md file along with the repository. Finally, click on Create repository at the bottom.
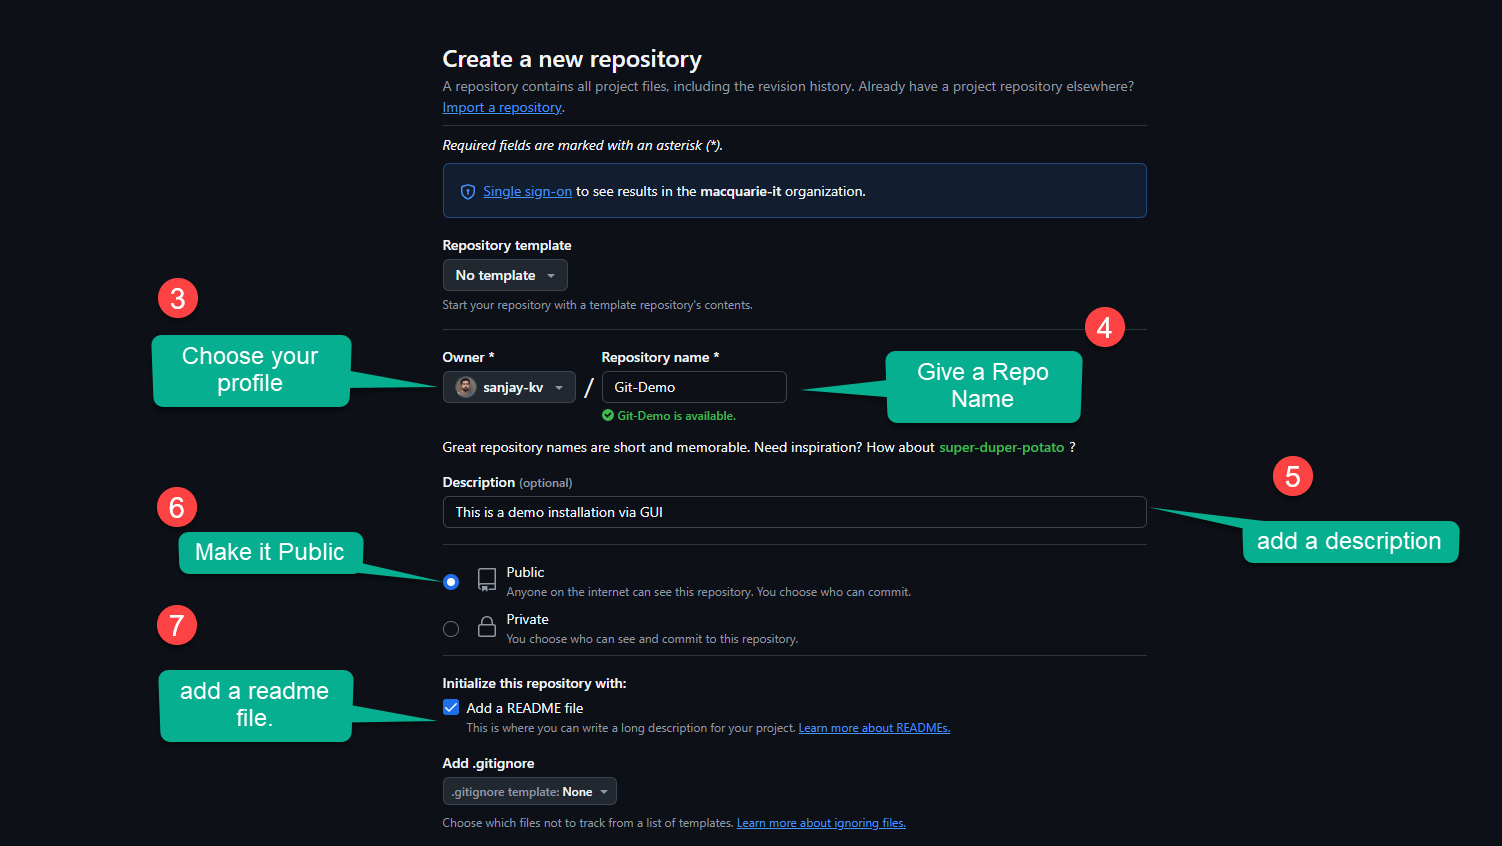
- Marker 3: Choose your profile
- Marker 4: Give a repo name
- Marker 5: Add a description
- Marker 6: Make it public
- Marker 7: Add a README file
Step 3: Tour your new repository
Once the repository is created, you’ll see a screen like the one below. The explanation of each element is below.
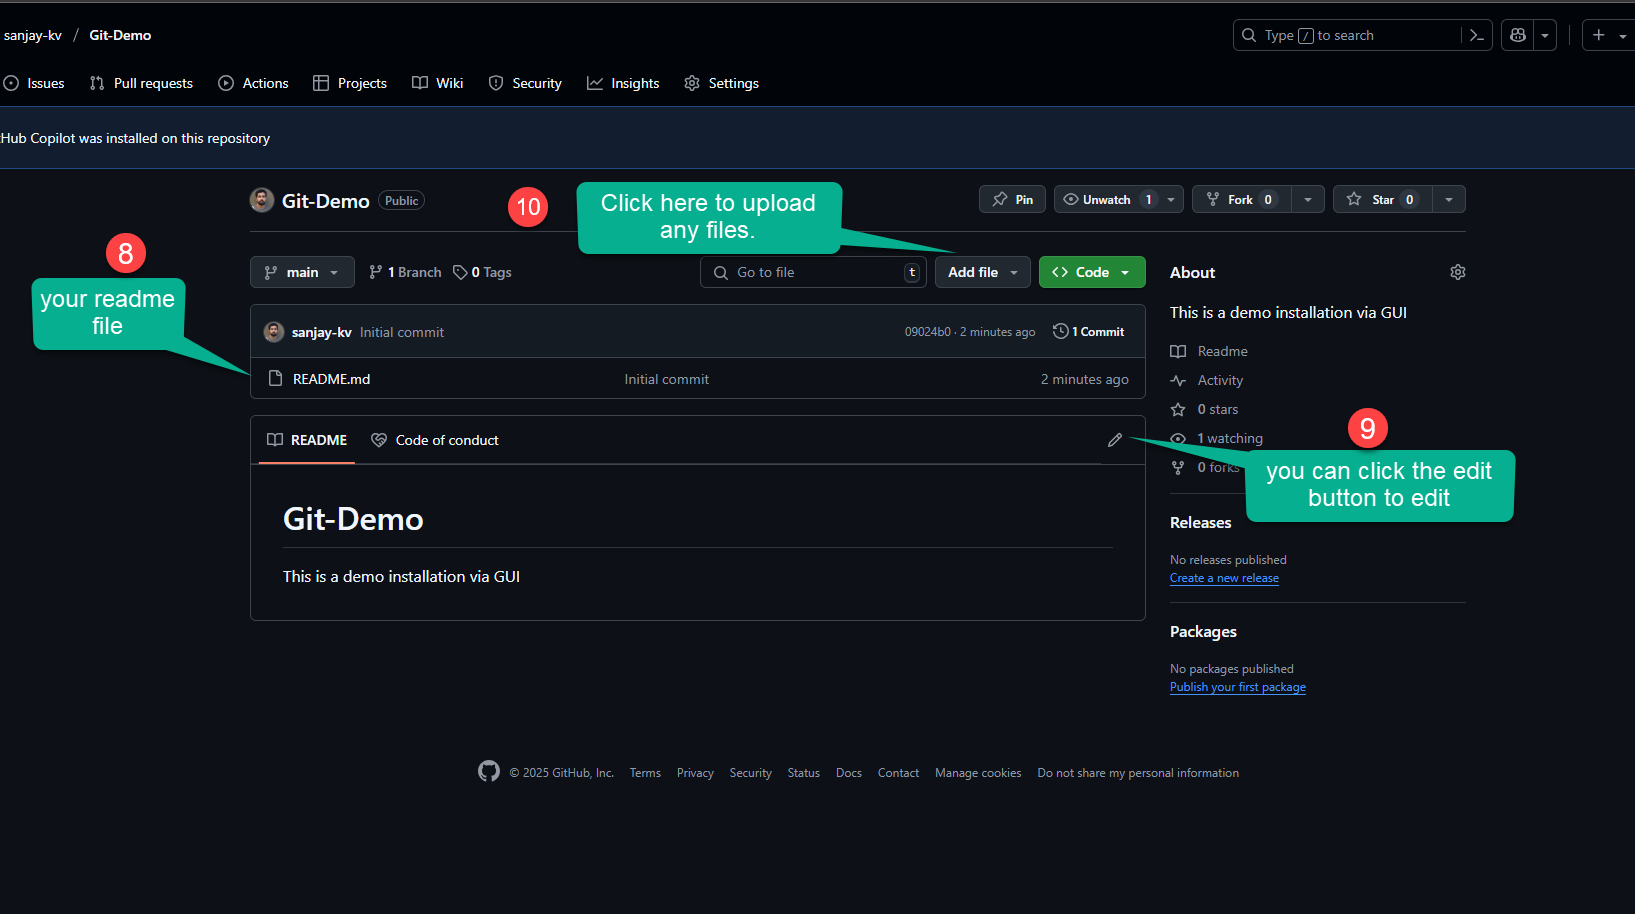
The README is the front page of your repository. GitHub shows it below the file list.
Click the pencil icon on the README to edit it in the browser.
Upload any files to the repository from here.
Step 4: Edit the README
I’m going to add my resume and include my name as a heading in the README.md file. Click the edit icon on the README.
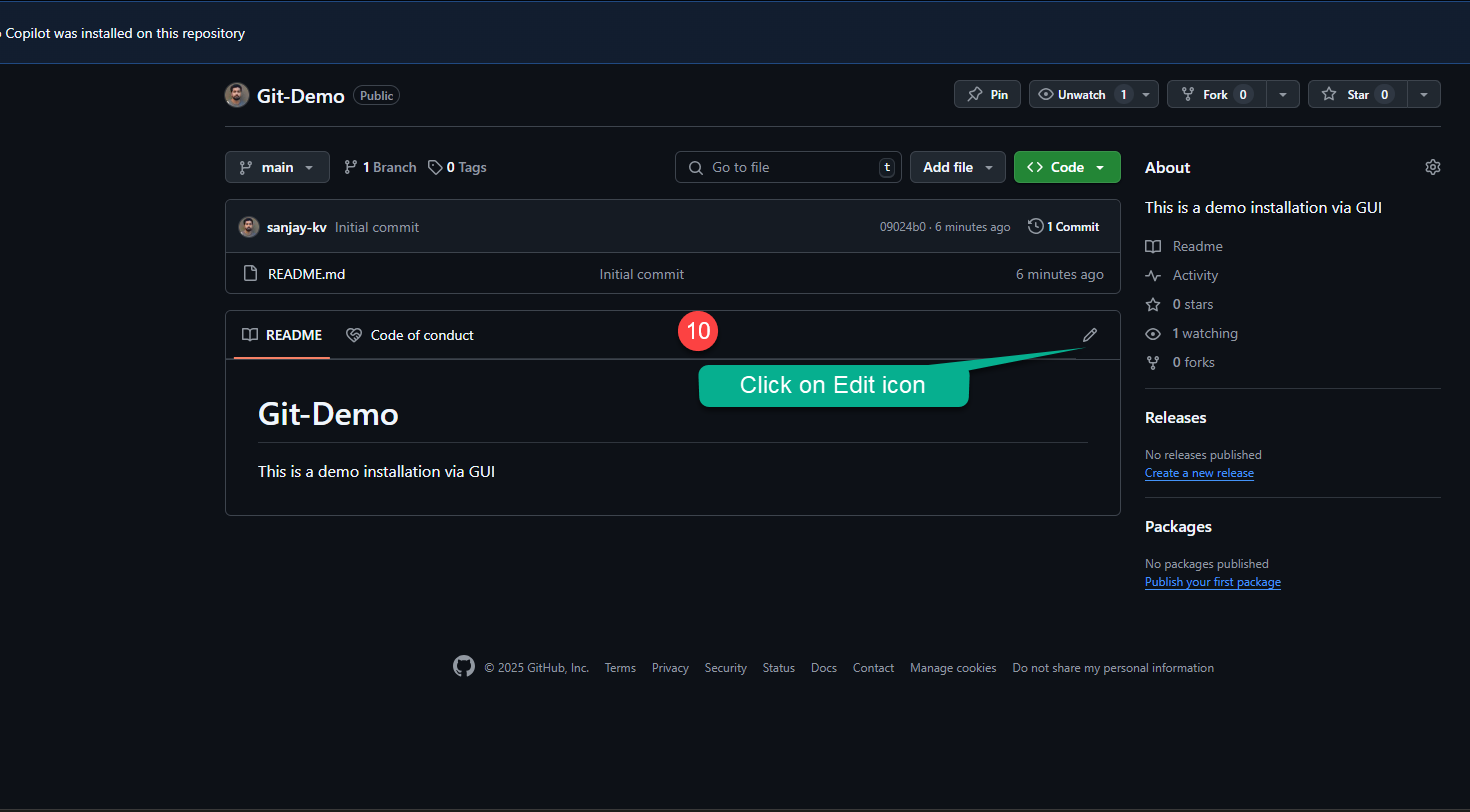
- Marker 10: Click on the Edit icon
The Markdown I added
README files use Markdown, a simple way to format text. Switch to Preview to see how GitHub displays it.
# Git-Demo
This is a demo installation via GUI

## Developed by Sanjay Viswanathan
This readme contains my resume, please refer to the attached file in the repo.
#A level 1 heading. Here it is the repository name.##A level 2 heading, smaller than #.Plain textA line without # is shown as a normal paragraph.Blank lineStarts a new paragraph or section.When you are done, click Commit changes to save your edit.
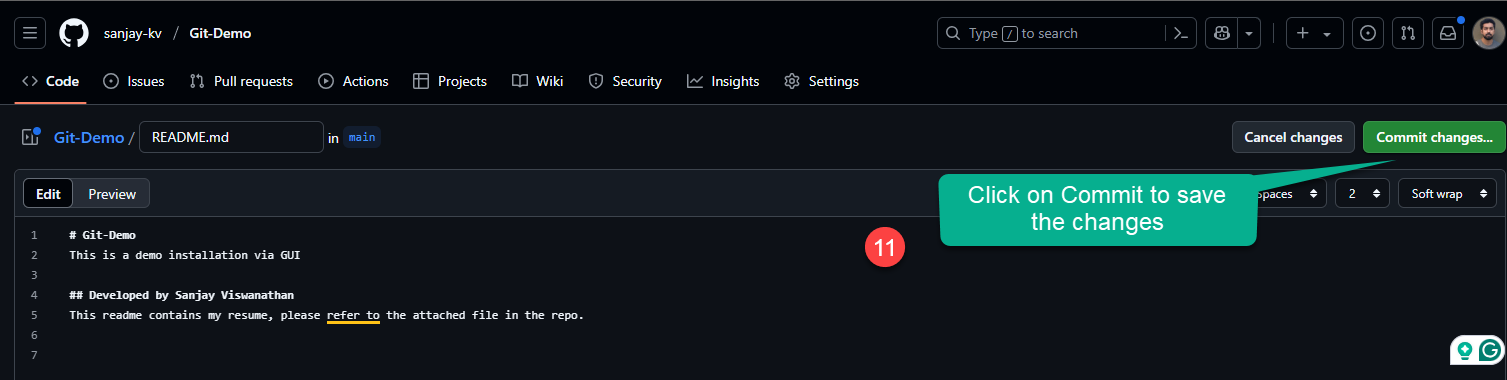
- Marker 11: Click on Commit to save the changes
Step 5: Commit the changes
This is the step where you add your commit message. A short message says what changed; the extended description can explain why.
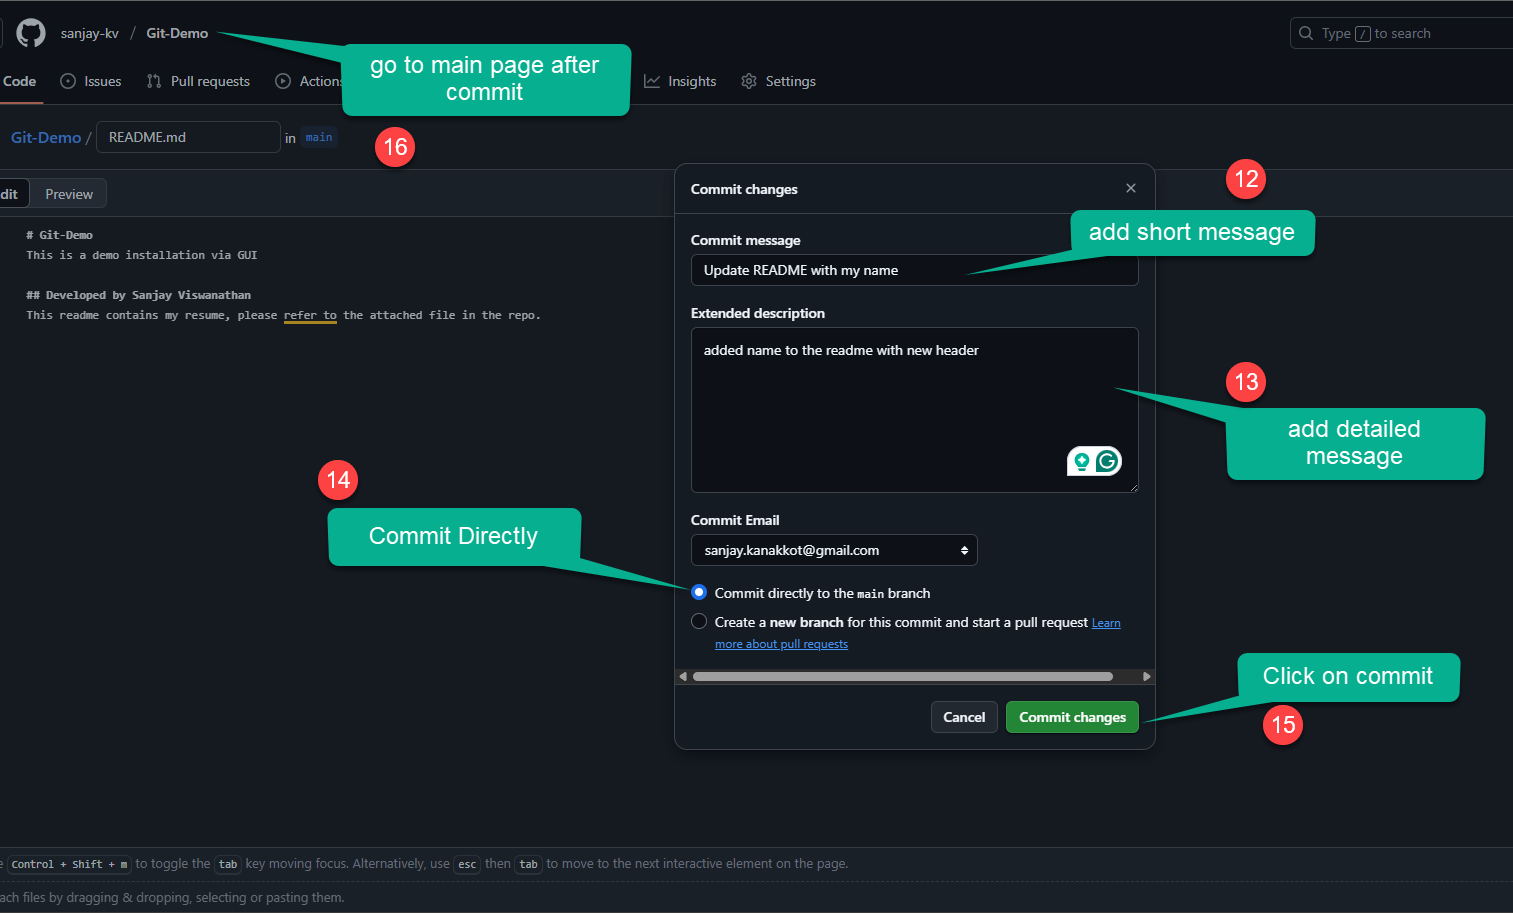
- Marker 12: Add a short message
- Marker 13: Add a detailed message
- Marker 14: Commit directly to main
- Marker 15: Click on Commit
- Marker 16: Go to the main page after the commit
Back on the repository page, you can see the result of your commit.
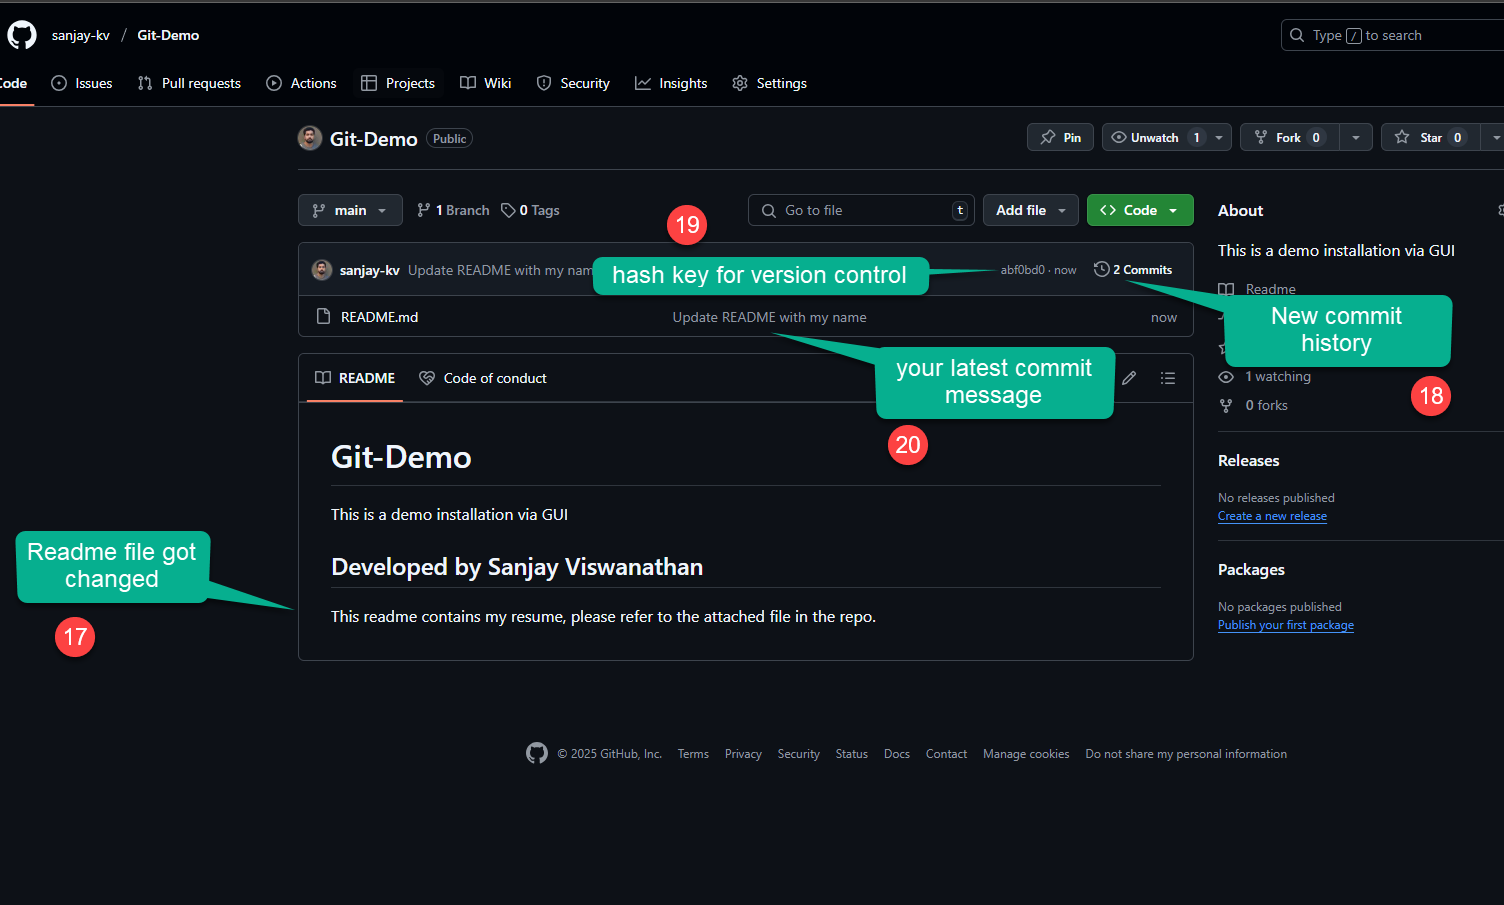
- Marker 17: README file got changed
- Marker 18: New commit history
- Marker 19: Hash key for version control
- Marker 20: Your latest commit message
Step 6: Upload your resume
Now let’s upload my resume to the repository. Click on Add file, then Upload files.
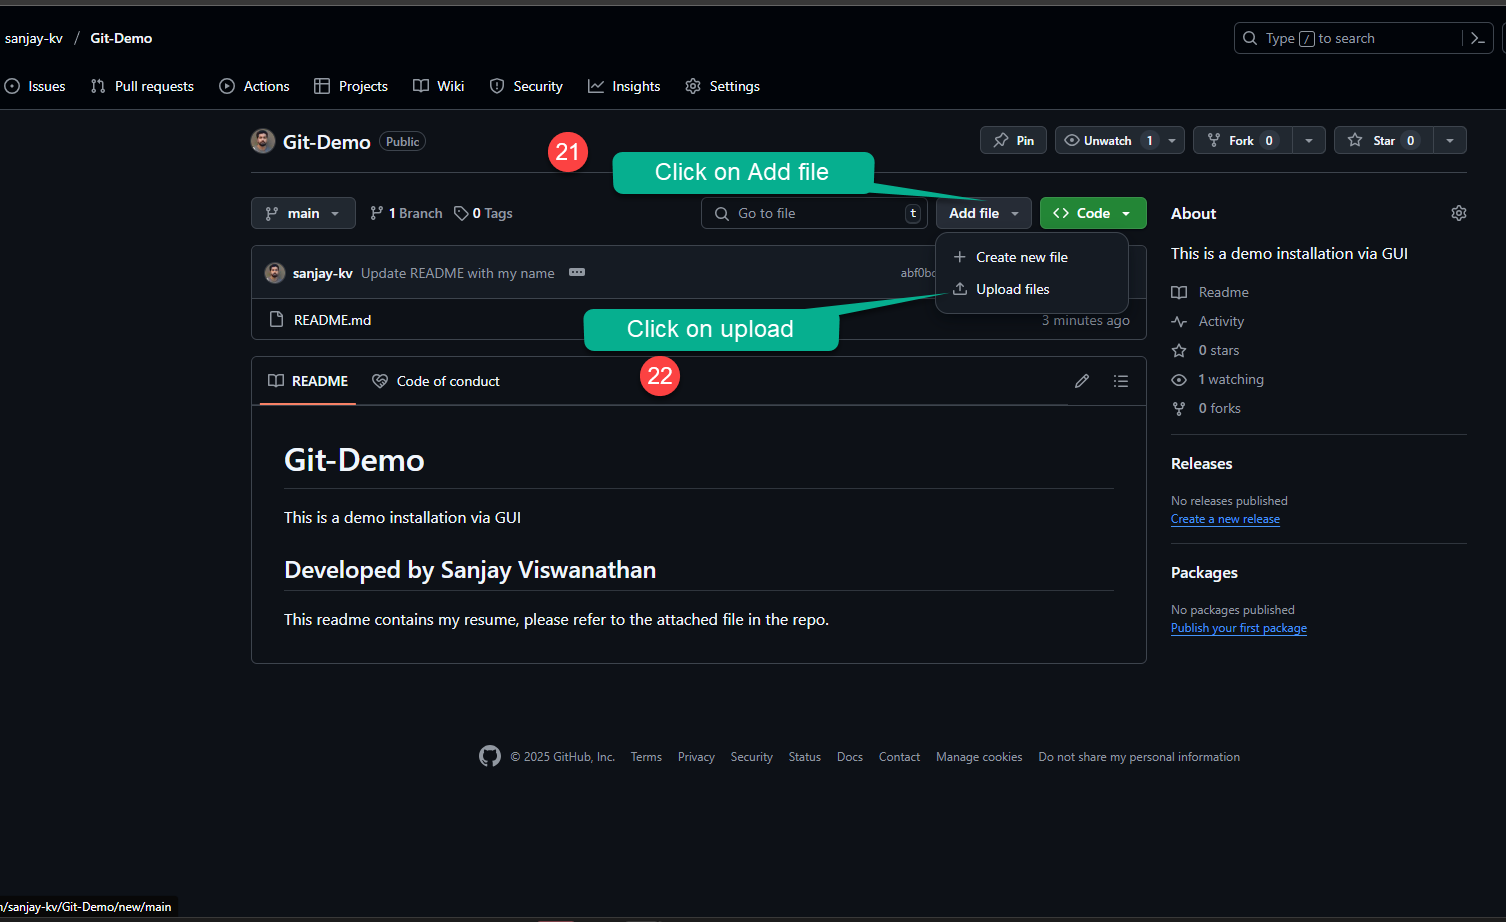
- Marker 21: Click on Add file
- Marker 22: Click on Upload
Drag your file in or choose it from your computer, add a commit message and click Commit changes.
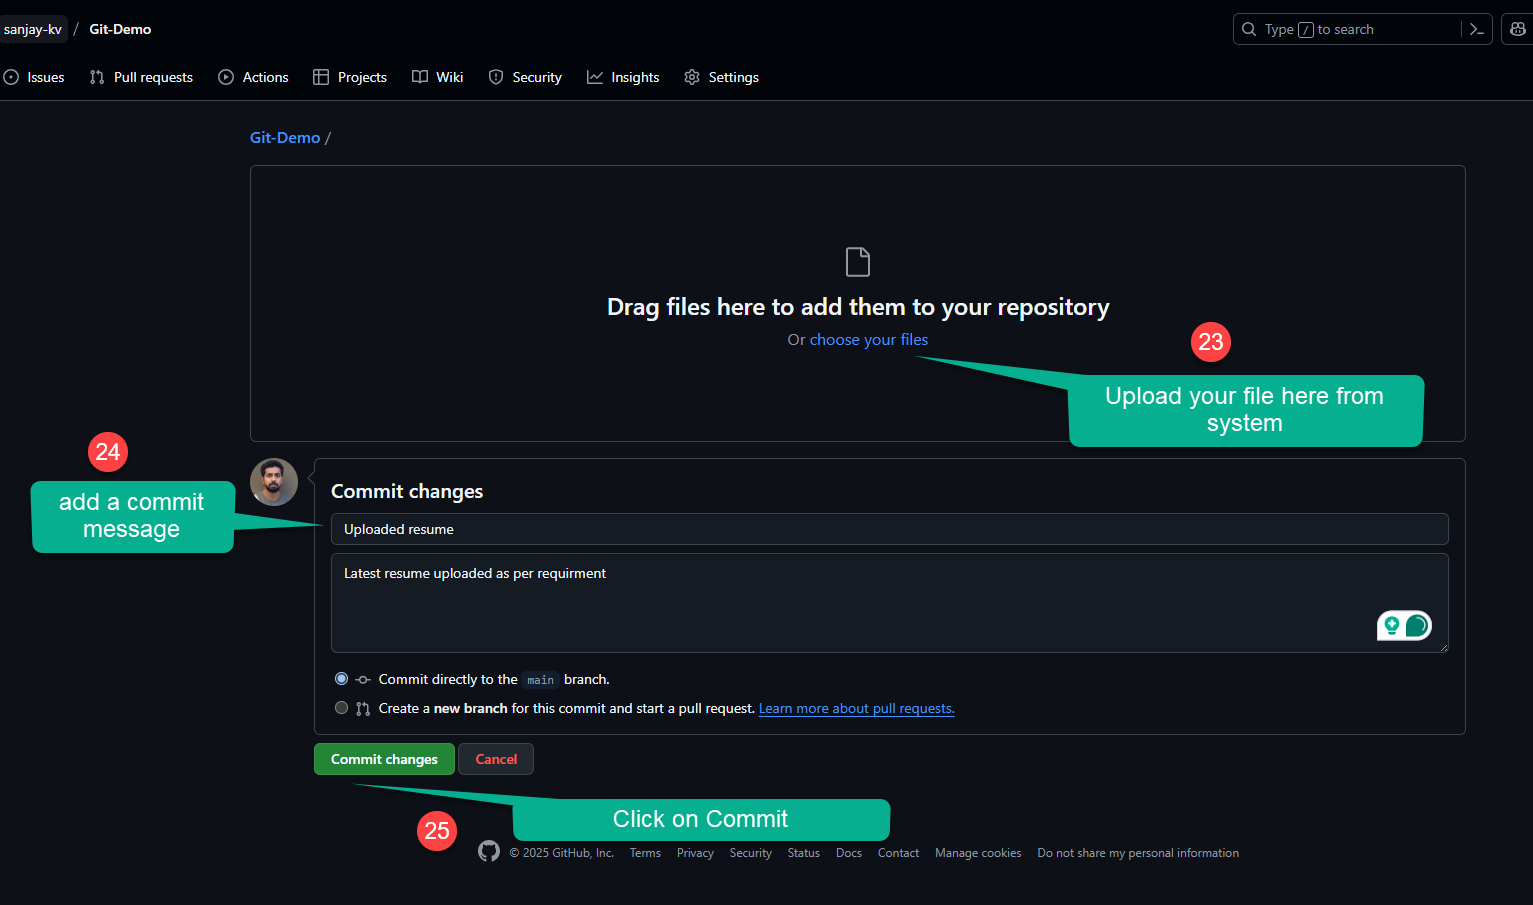
- Marker 23: Upload your file from your system
- Marker 24: Add a commit message
- Marker 25: Click on Commit
You will now be able to see the uploaded resume in your repository.
Watch the video tutorial
Conclusion
In this tutorial, you created a GitHub repository from the web interface, edited its README with Markdown, committed your changes and uploaded a file. In the next post, you will create a repository from the command line.
UP NEXT · LESSON 7Create Repo Via Command line
Your vote helps us improve our docs.
All our docs are open source. Found a typo, want to add detail or have a better explanation? Anyone can contribute.
Comments
Powered by GitHub Discussions