Create Repo Via Command line
In this tutorial, you will learn how to create a GitHub repository and push your first files to it from the command line.
Prerequisites
- You should have a GitHub account.
- You should have a basic understanding of how Git works and ensure Git is installed and running on your operating system.
Your checklist
Step 1: How to create Github Repository
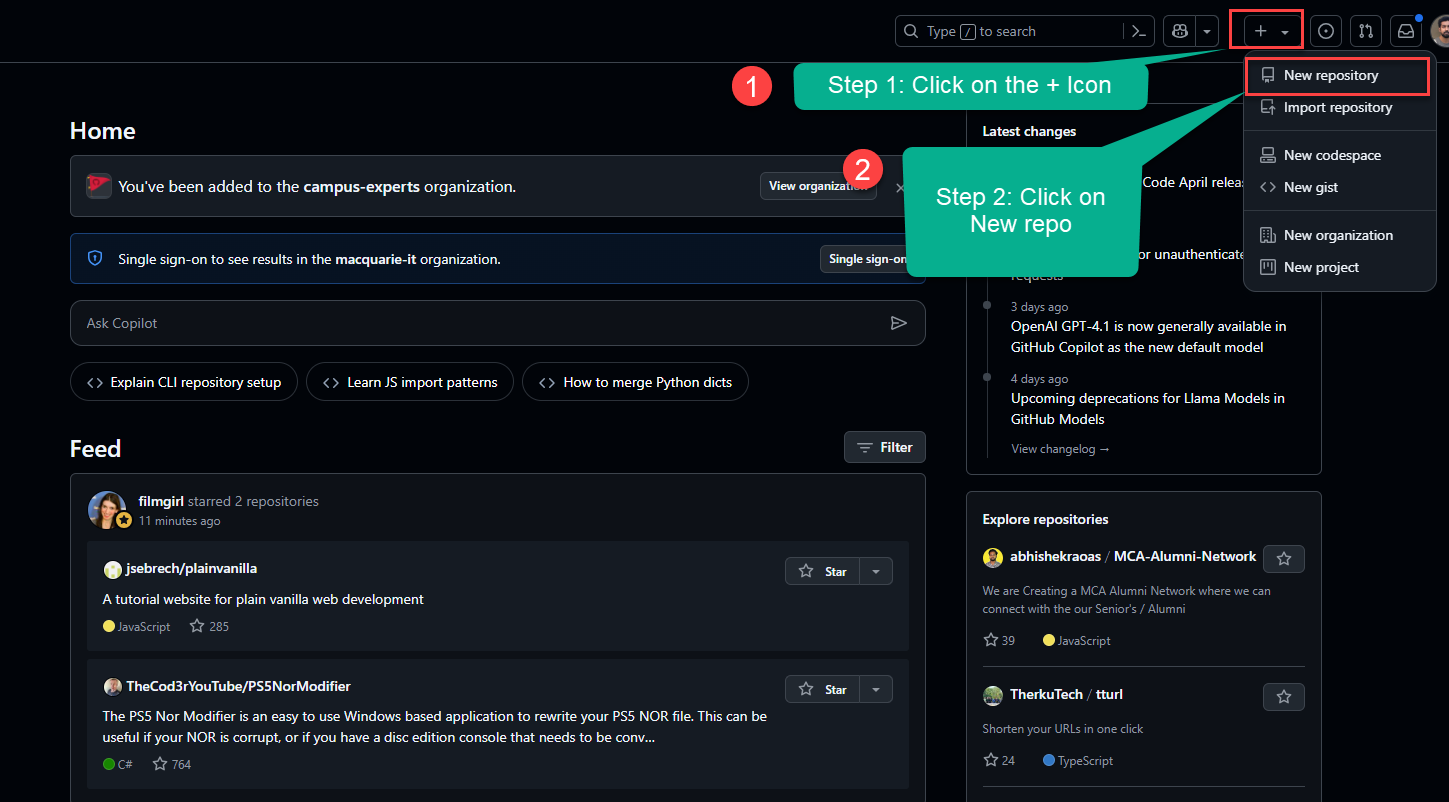
1. Go to GitHub and create a new Repository.
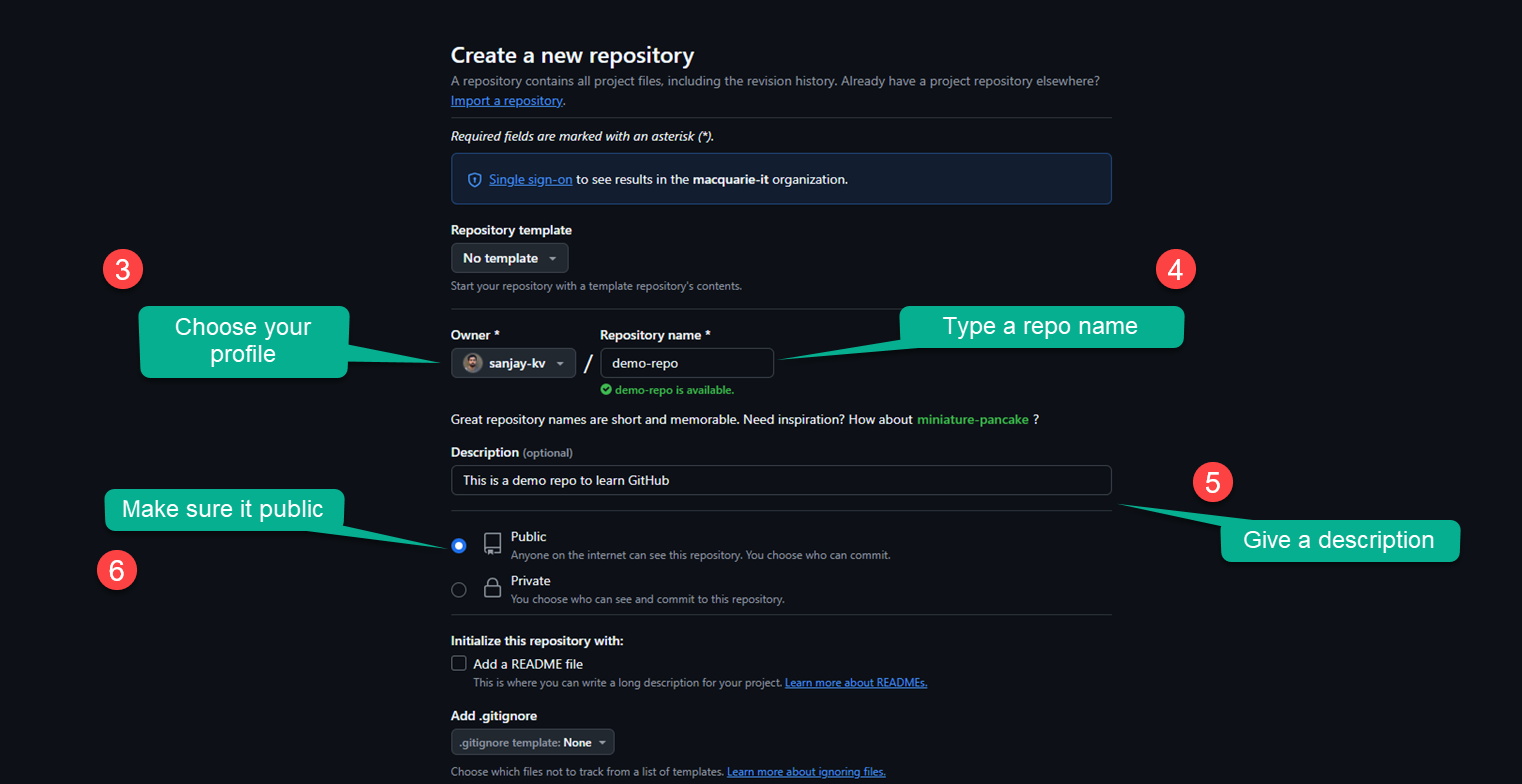
2. Specify the name of your project, make it public or private, check the option to include a README file. Then click on Create repository on the button below.
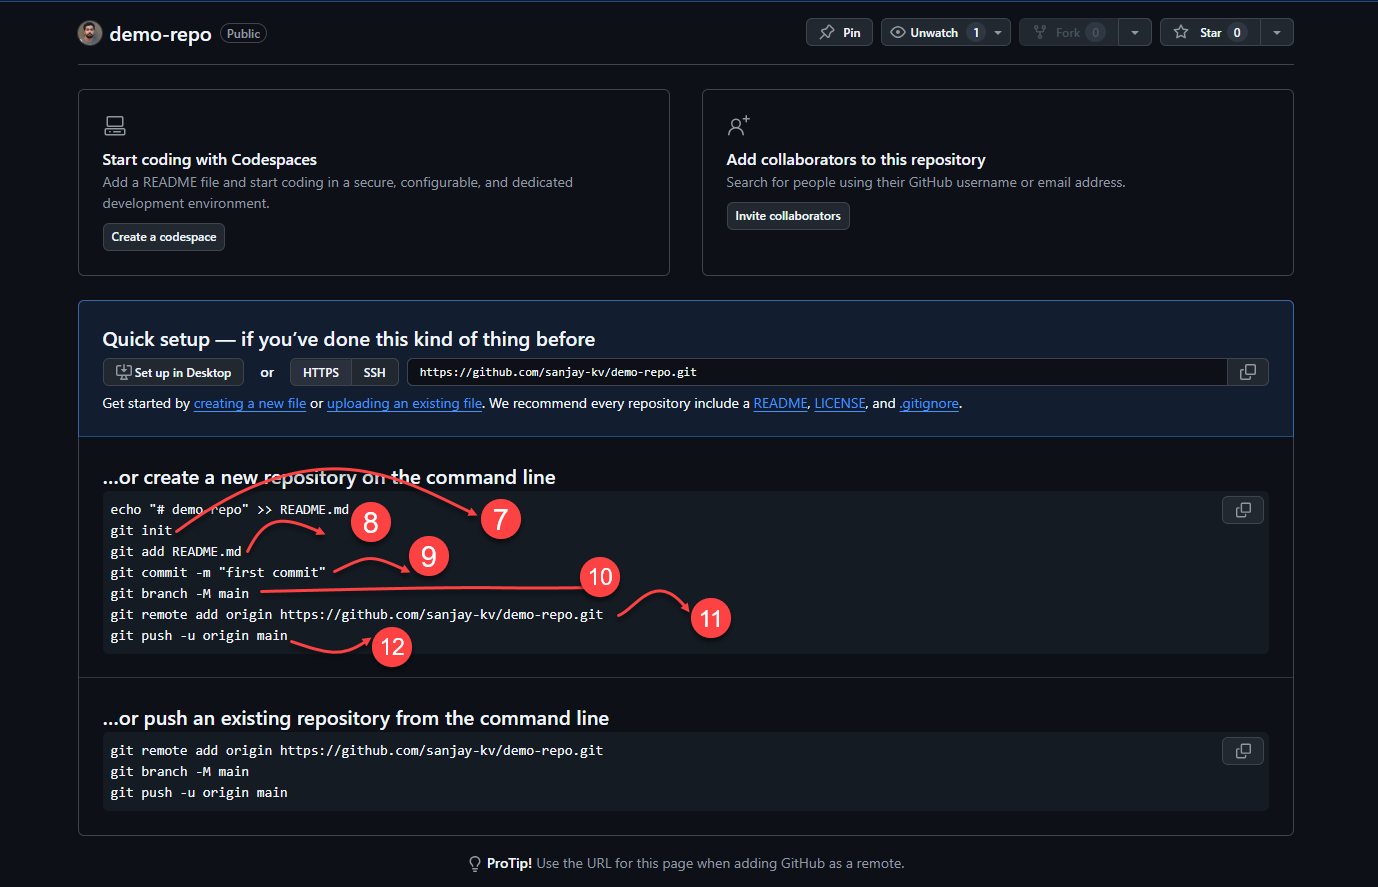
Once the repository is created, you'll see a screen similar to the one below, the explanation for each element is provided below.
echo "# demo-repo" >> README.md
git init
git add README.md
git commit -m "first commit"
git branch -M main
git remote add origin https://github.com/sanjay-kv/demo-repo.git
git push -u origin main
Step 2: Browser Rendering
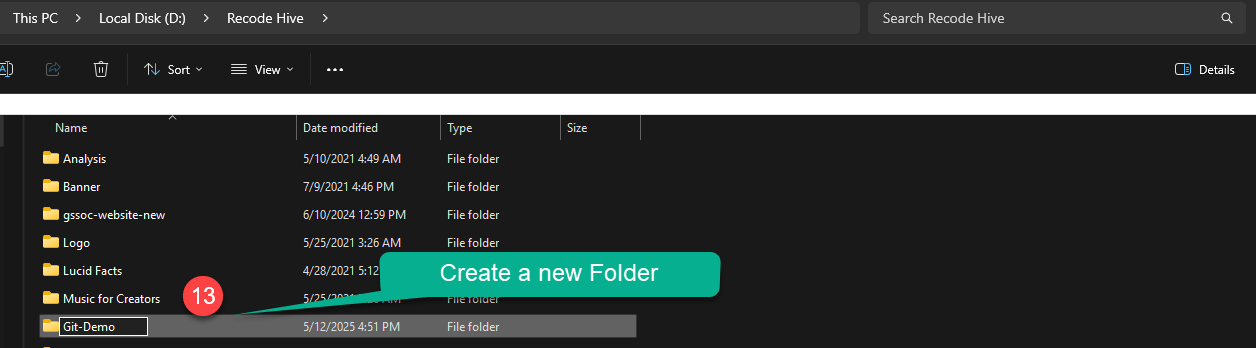
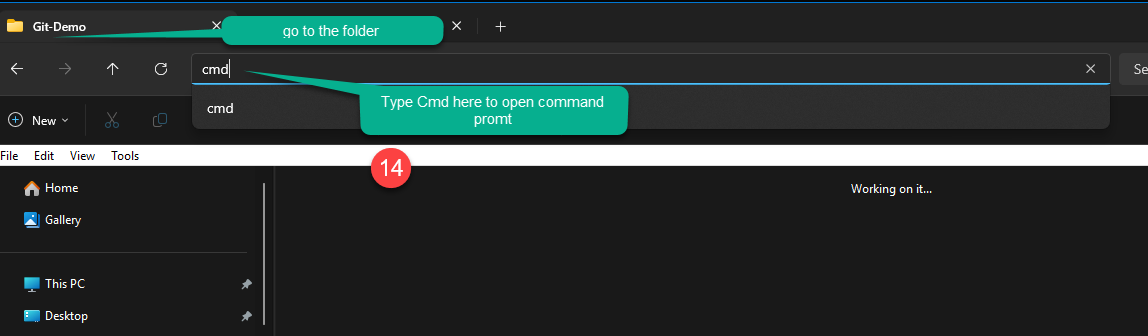
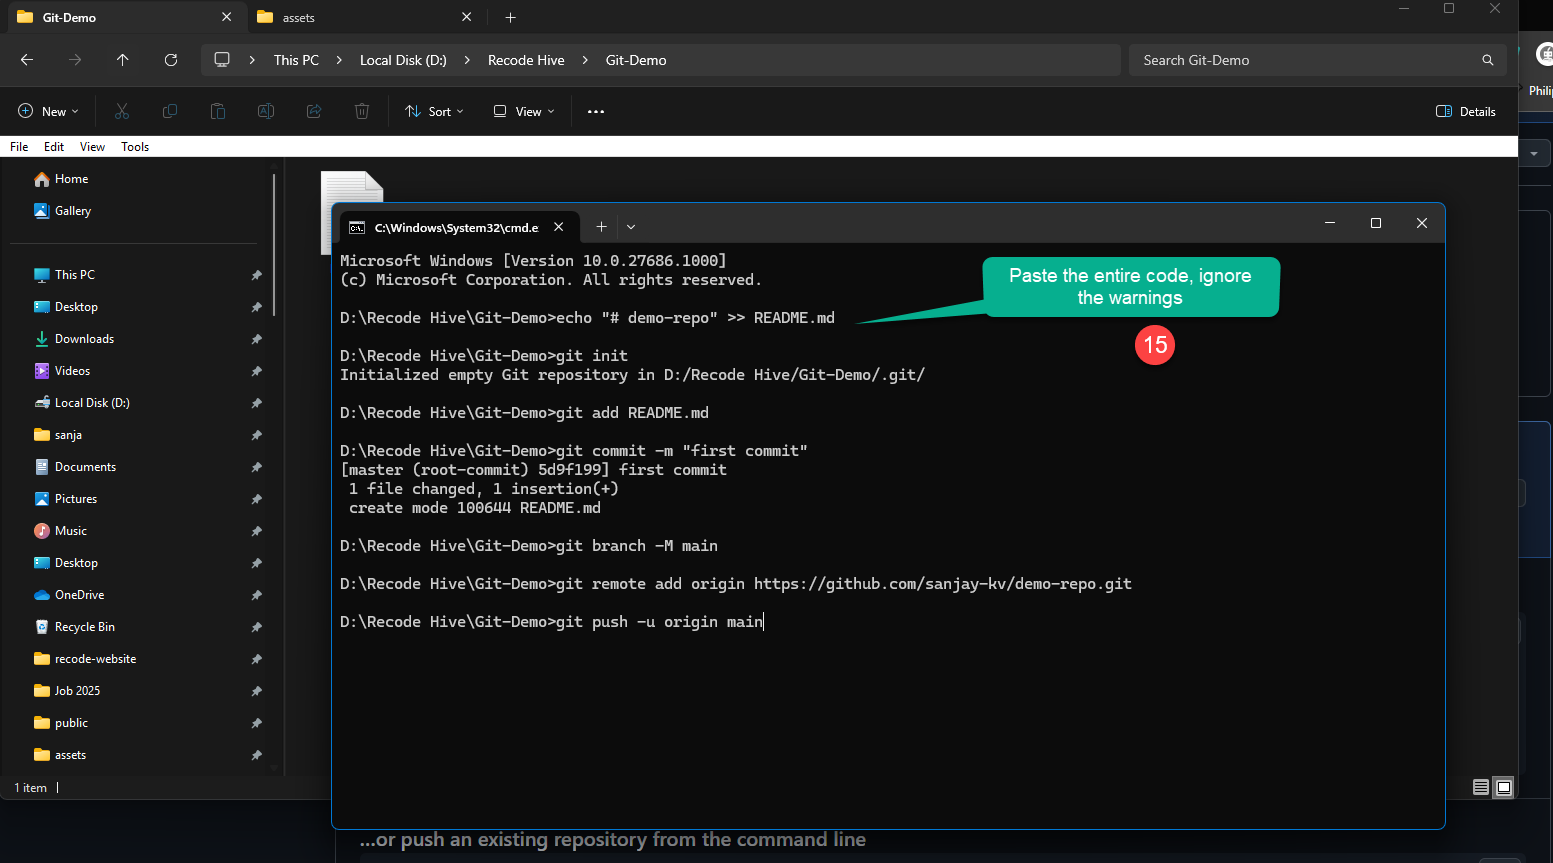
Now you can see the new file has been added to your local system

10. Once the work is done, click save and open cmd or Terminal
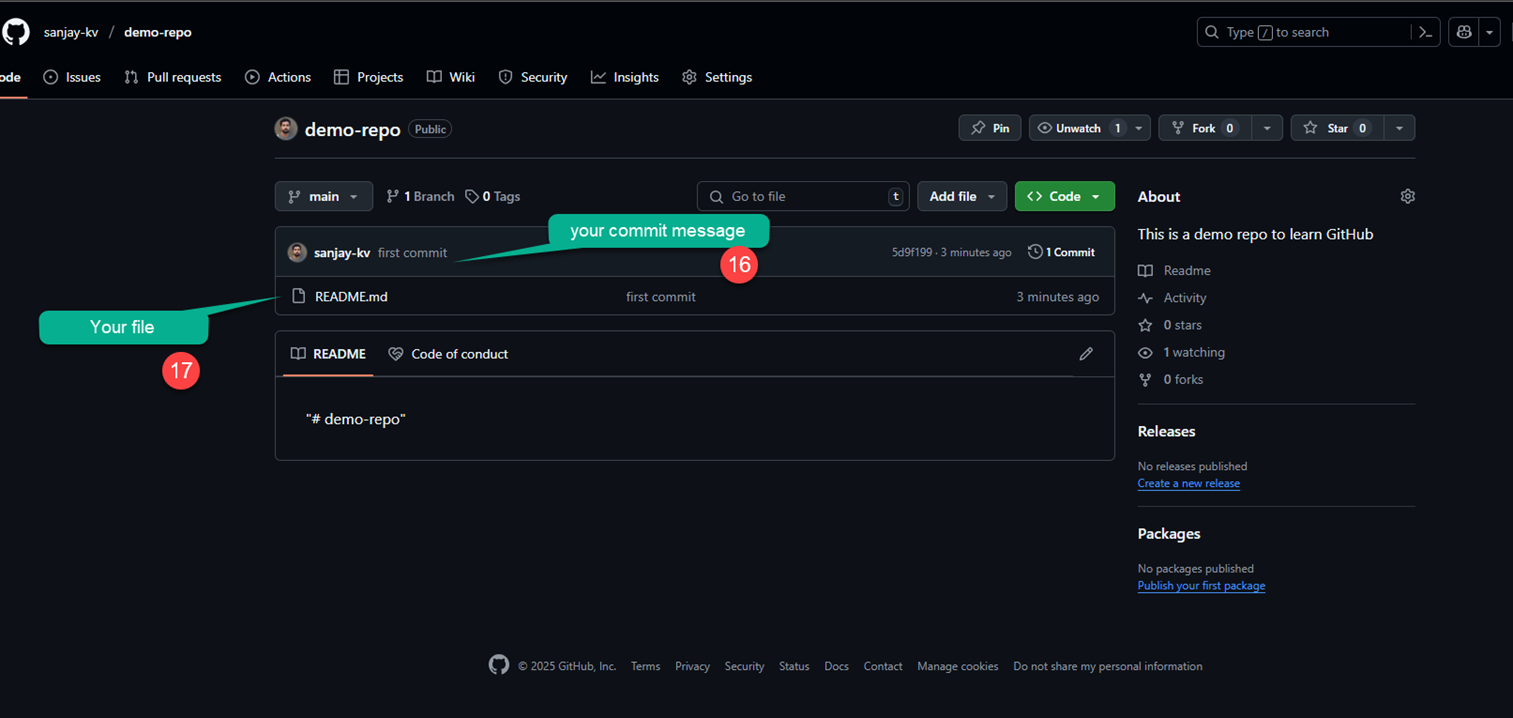
11. Initially when I was creating the repo I used Git add * to add all files in one go.
If you are committing for the first time, Git may prompt you to enter your GitHub email id and username to proceed. The screenshot below shows an example of the prompt. After entering these details, when you run the git push command, a browser window may open asking you to sign in to GitHub.
git config --global user.email "Enter your github Email"
git config --global user.name "Github username"
Watch the video Tutorial
Conclusion
In this tutorial, you created a repository on GitHub, then used Git on the command line to add a file, commit it and push it to the remote repository.
UP NEXT · LESSON 8How to clone repository
Your vote helps us improve our docs.
All our docs are open source. Found a typo, want to add detail or have a better explanation? Anyone can contribute.
Comments
Powered by GitHub Discussions